
Accounting
Excel Tips & Tricks for Accountants: Data Fill
Welcome to the second post in my three part series, “Excel Tips & Tricks for Accountants.” If you missed it, you can read part one here: Format Painter.
If you’re interested in learning more top Excel skills accountants need to know to be efficient on a daily basis, be sure to register for my upcoming two part webinar with FloQast, entitled, “Become EXCEL-lent – Excel Tips & Tricks for Accountants.” Until then, I hope you enjoy this tip that will give you a more elegant and streamlined alternative to constantly using Copy and Paste. To follow along and try for yourself, download this Excel workbook, then go to the Office Ribbon and click on the Home tab.
Excel Tip #2 – Copy that with Data Fill:
You can find the Data Fill box on the bottom right corner of the cell or range of cells that you currently have selected. Using Data Fill, among other things, allows you to copy a formula without having to use the traditional Copy and Paste icons or Control-C / Control-V shortcuts on your keyboard.
In this exercise, you’ll copy a simple formula to the cells below it using Data Fill.

- Open the Sales tab of the Excel Tips Workbook file.
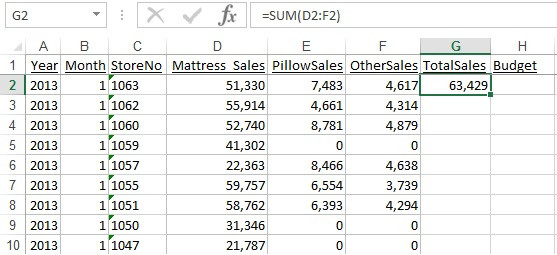
- Enter the following formula in Cell G2: =SUM(D2:F2). This will add up the total sales by store and by month.
- Hover the cursor over the tiny black or green box in the lower right corner of cell G2. (The cursor should turn into a plus sign).
Now the Data Fill feature is activated.
- Click and drag the Data Fill box down to cell G6, then release.
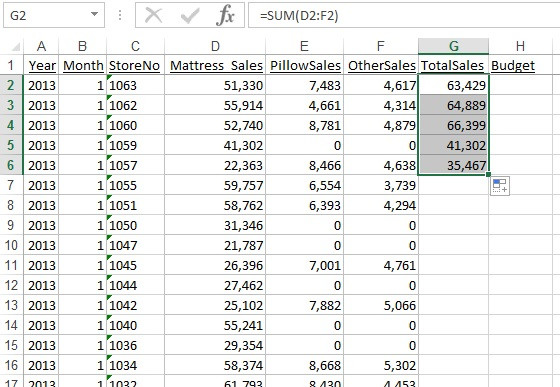
As you see, dragging the Data Fill box copies the formula in cell G2 into the cells below. This is a big timesaver, but what if you have thousands of empty rows to fill up? Excel has a trick for that.
If you double-click the Data Fill box, Excel will help you out by copying the formula down to the last cell in the adjacent column. Let’s give that a try.
- Select Cell G6 and hover the cursor over the Data Fill box (your cursor will turn into a plus sign).
- Double-click the Data Fill box.
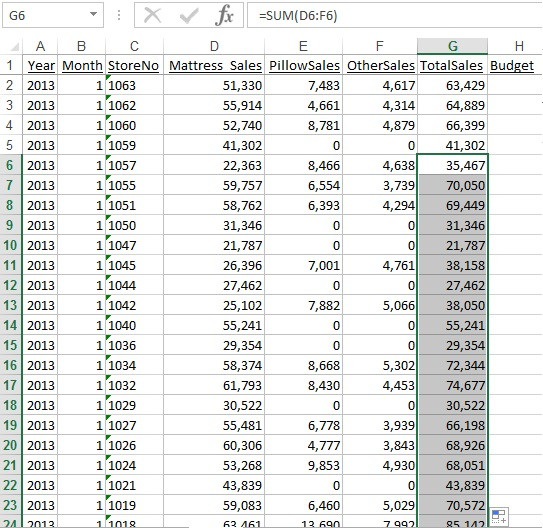
Presto! Isn’t that great? I’ve watched people waste time dragging the Data Fill box down countless rows when all they have to do is double-click it.
I’ll be back with more Excel tips & tricks soon! To ensure you don’t miss my next post, subscribe to FloQast Blog updates via Cloud Accounting Weekly.
This is just a small taste of the amazing things that our favorite spreadsheet program can do — for more, join my two-part, free CPE webinar, “Become EXCEL-lent – Excel Tips & Tricks for Accountants,” which I’ll be presenting live with FloQast on May 22 and 24. I’ll demonstrate LIVE my top Excel tips and tricks via a screenshare — you can even follow along in your own copy of the workbook if you choose.
About ExcelCEO: ExcelCEO was developed by Jim Cline to train people who want to become Excel experts. The ExcelCEO Excel course (available for Excel 2016, 2013, 2010 and 2007) is self-study and is worth 40 hours of CPE credit (via NASBA’s QAS program). For more information about CPE credits, please see the ExcelCEO website at www.ExcelCEO.com. Feel free to browse the website and explore more about the ExcelCEO program. For more information about ExcelCEO, please email [email protected].